Warning: Use of undefined constant MSW_WPFM_FILE - assumed 'MSW_WPFM_FILE' (this will throw an Error in a future version of PHP) in /nfs/ank/home1/a/awa/public_html/news/wp-content/plugins/wordpress-file-monitor/wordpress-file-monitor.php on line 39 2013 January » Fine-art Children's Couture Photographer

Monthly Archives: January 2013

Greensboro NC Photographer Forget Me Not’s Cutest Kid Contest 2013- with a new spin


Thanks to everyone who participated in this year’s charity model search! Winners have been announced via the chartity model search website at

www.charitymodelsearch.org


logo


We’ve had 3 years of success at our Cutest Kid Charity fundraiser (raising nearly $6000 for local Triad charities and given away even more in prizes), and even though we told everyone we would not be doing it again this year, we just couldn’t say no when this opportunity presented itself! Many of you may know that during this past year, we have joined the ranks of the many others photographers worldwide who volunteer with Now I Lay Me Down To Sleep (NILMDTS), a fabulous charity which offers complimentary remembrance photography for families going through the loss of a child. Every year since the launch of our own Cutest Kid Contest, NILMDTS has also done what they call a “Charity Model Search”.  It’s very similar to what we’ve done in the past, but the contest is nationwide, and they have put together the prizes. That frees us up to focus on our client’s and gives us the ability to offer full sessions (rather than minis).  Since we no longer have to spend the majority of our time on the contest collecting prizes, we can once again throw our hearts and energy into supporting some fabulous local charities through this fundraising en devour and, as a bonus, share and support NILMDTS. Isn’t that fabulous!!!


So we are excited to announce that A Forget Me Not Moment’s  Cutest Kid Contest is back on for 2013!


cms_eblast2013


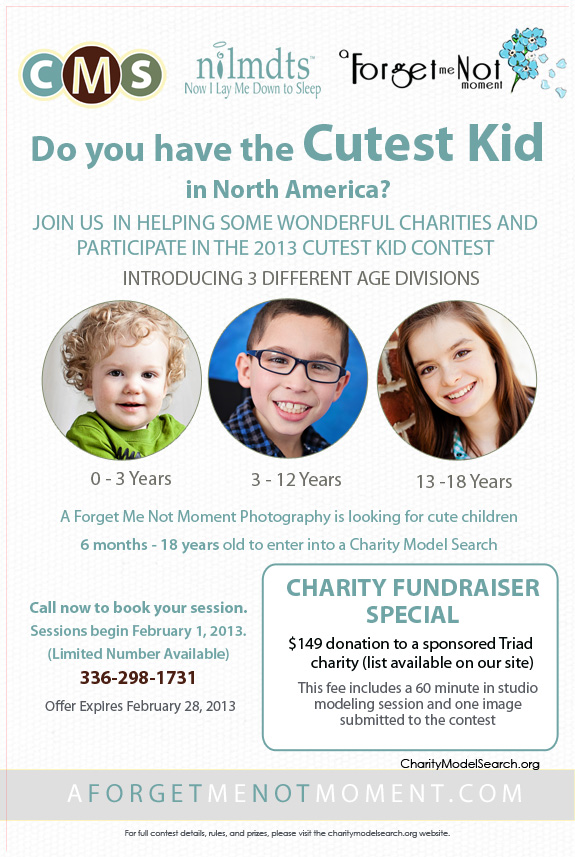
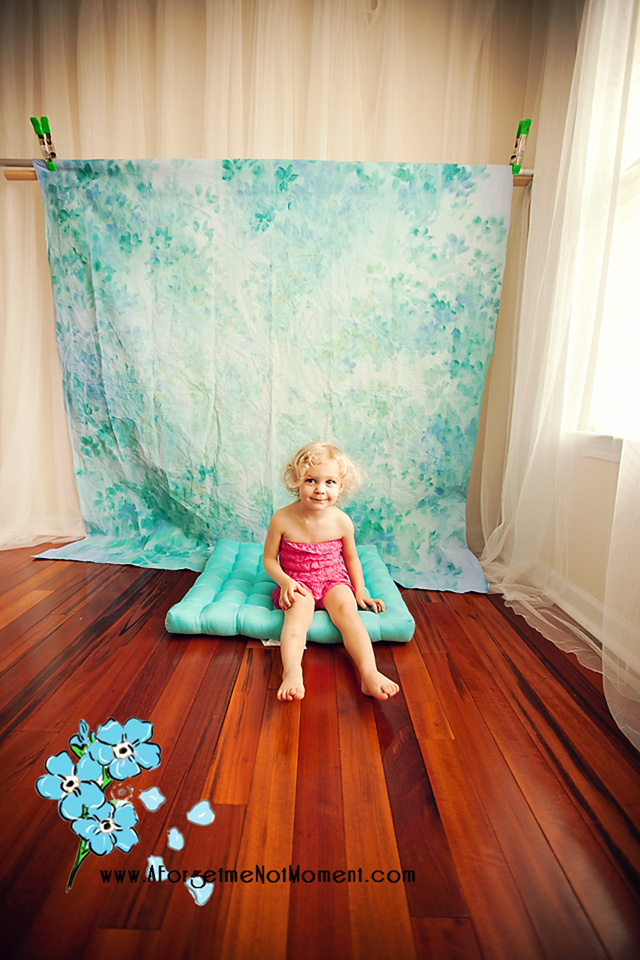
The details for entrance into the contest are nearly the same as they have been for the past 3 years. For a $149  (our standard session fee) direct donation to one of our sponsored charities (all local!) you will receive a full studio session and entrance into the contest! There are FABULOUS prizes up for grabs for both our area winners  (offered by our studio and a handful of locally owned business sponsors) and nationwide!

The contest sessions will run throughout the entire month of February with a limited number of slots available. Voting will take place via the Charity Model Search website. It is $1 donation to NILMDTS per vote. Finalists will be chosen in each category and final winners will be determined by the Charity Model Search panel of judges!

Bookings for the contest are happening now, so if you know you want to participate, contact the studio today! (336)298-1731 or studio@aforgetmenotmoment.com

Our sponsored charities this year are as follows:

The Family Support Network of Central Carolina

The Family Support Network of Central Carolina is an organization which serves families whose children have special needs or who are born prematurely.
Rather than go into all the details here on the blog, I invite you to view their website at http://www.fsncc.org/Donations.html

I am 100% certain that after you read even just a little about this great organization you will be even more excited about getting a chance to participate in this fund-raising event!

header_final_2

Heartstrings Pregnancy & Infant Loss is a 501 (c) 3 nonprofit organization founded in 2005 by the mother of twin boys who died at birth.  After experiencing her traumatic life-changing loss, she established Heartstrings as a way to help other parents suffering a loss to know that they are not alone and to help them regain hope. 


Heartstrings provides peer-based support groups throughout the Triad, each led by a trained facilitator and support parent.  Our mission is to provide compassionate validation, bereavement education and hope to families who have suffered pregnancy and infant loss. We are the only grief support resource that focuses on the loss of a baby from conception to one year of age and that offers peer-based support groups, one-to-one peer support, and subsequent pregnancy support to families throughout the Triad. Our services are free, and the families we serve are local. We are funded by donations and small grants, and every contribution is appreciated.


Educating the community about adoption while providing support to Christian families in North and South Carolina through education, resources, financial assistance and prayer support.

Can you reallly find a better cause then helping children come home to a loving family!?

Check out all that Caroline’s Promise offers by visiting their website:

www.CarolinesPromise.net

Contestant Participants in each category  have the chance to win the following in cash and prizes for the national contest!

1st Prize

$500 cash

A New Camera

6 Movie Tickets

$75 Toys R US Gift Card

$50 Target Gift Card

2nd Prize

$250 Cash

A New Camera

4 Movie Tickets

$50 Toys R Us Gift Card

$25 Target Gift Card

3rd Place

$100 Cash

A New Camera

2 Movie Tickets

$25 Toys R Us Gift Card

Other prizes shall be awarded for our local winners (votes tallied via Facebook) to include studio gift cards and items from several local business sponsors.

Bookings for the contest are happening now, so if you know you want to participate, contact the studio today! (336)298-1731 or studio@aforgetmenotmoment.com

Greensboro Portrait Studio – Our small and humble, but gorgeous Greensboro home studio space (for fellow photographers)

Its a LONG time coming, but I finally feel like I’m ready to share pictures of our home studio space and talk about how it all came together. This is a 10X14 upstairs bedroom that we have converted into a studio. I also have a 10X10 front room that is my actual office where I keep all of our product samples, etc. I’ll share that on another day. We use the main living area for proofings, the office for pre-consults, and then the studio when we shoot indoors. Eventually we’d like to move onto some property and build a small building for a studio, but for now this works great, clients love it, and I get to get comfortable at “home” when I’m at “work”.

So here is the space as you enter the main doorway. We’ve used an IKEA curtain system to cover both of the main windows. We took out all the carpet and put in this beautiful hardwood.  I have 2 main shooting areas (right by the bear, and to the left where you can’t currently see).  The couch to the right is my waiting/put all your stuff area. I usually have the bears put up, but my kids have been playing in there so I left them out. 🙂


IMG_6787 copy

Here is another picture as you enter, but on the left of the image you can see the other shooting area. I have my scrim and reflectors tucked up against the side wall there when I’m not using them.  I use a foam core insulation board as my main reflector, and then on occasion use that scrim if I have to break out my OCF. Normally though I try to do only natural light (just prefer the look).

IMG_6786 copy

Here is an even wider shot of the whole space (expect the storage area)

IMG_6788 copy

This is my main shooting area. I get the most flattering light/shadow combination when shooting here in the early morning. By late afternoon the sun is blaring in this window and the shadows can be a bit more harsh so I’ll move over to the other area (where the lighting tends to me a little more flat). I have a large portable backdrop stand piece (its like a metal pvc pipe) that stretches the entire amount of the wall, so technically I can fit two different backdrops/setups on that wall at once. (please excuse the wrinkles! ;0). You’ll see in a minute how I’ve actually dealt with using my backdrops.

IMG_6798 copy

Here is the other area (and my daughter assisting with the photos ;). This area faces the large window, so the lighting tends to be a little more flat, although still very flattering.  In this picture you can see what I’ve done to be able to stick the backdrop pieces so they’ll stay there on the wall. I have a piece of plywood stuck back behind those which I use to flatten out my misc fabric backdrops, or if I’m doing something different (like newspapers, paper flowers, whatever).  I can also store my foam cores flat (which are used as reflector and backdrop) flat against that wall so they are out of the way as well. The metal pieces are placed just barely high enough to keep those from falling over, and close enough to the wall nothing really slips around. I use the A-clips to hold everything in place. Oh.. and on the back you can see a shower curtain I’ve actually placed on curtain hangers that I can slide up and down the pole for a cute (but short) backdrop there as well.

IMG_6785 copy

Here is a closer picture of the system that we’ve got holding everything up. Its attached into the wall with wall anchors. You can see one backdrop is clipped onto the plywood at the back, then the foamcore is there in the front.

IMG_6789 copy

Here is how I shoot against the foam core, either standing it horizontally or vertically.

IMG_6799 copy

Here is an actual decent picture from that area.

IMG_6801

Now moving on to the storage/waiting areas. You can see the parent couch on the left, the place where I hang most of my backdrops straight ahead (some are folded up top and others are tucked into tubes in the right hand corner), and then shelving on the right.

IMG_6777 copy


Here’s the shelving right behind the door with some of our rugs/blankets, etc.

IMG_6776 copy

This is the system we actually use to store/hang all the backdrops. Its just a simple closet shelf system with different heights of  brackets (with the shelf on the top because I didn’t want to have to reach soooo high to get them down from there). We did the different levels to make it easier to get them down, and so I could actually shoot against this wall if I wanted to.  I got the baskets for under the shelves so that space woudlnt’ be wasted. You need to have some space there so you can lift the backdrops out, so we couldnt over crowd the space. You may also be able to see I have some pettiskirts hanging behind there as well. (Have you utilize all the space you can so you don’t take over your home!)


IMG_6780 copy

The backdrops themselves are stapled onto large wooden dowels which span the length of the wall. I can just lift up/down/move around the dowel to wherever I need it. When I’m shooting on the other walls, you can see I just lift the dowel over the metal pieces and A-clip them into place (see the above image with the teal backdrop and the little girl in pink).

IMG_6795 copy

On the outside edge, I bought a tie hanger to hang up scarves (on the left there).

IMG_6796 copy

Then here is a picture of how I would use this area to actually shoot with. Just drop down one of the drops (or grab a metal dowel and add one to it) and place it there so it hangs at the height you need it. The brackets are removable. We just have them at heights that are practical for storage and use.

IMG_6808

And last, but not least, the closet.. FULL of props.

IMG_6793 copy

IMG_6794 copy

Oh and I can’t forget the cute little frame I painted to hold my hats/bows. It was just a vintage frame I picked up at a yard sale (may have had a mirror in it/can’t remember). We painted a cute little pink, added some plastic backing pieces with some decorative ribbon to hold the bows, etc.

IMG_6784 copy


Thanks for touring our studio! I hope this was helpful for you and you can use some of the storage tips in your own space!

Adventures in Homeschooling – Personal Story by North Carolina Children’s Photographer

We have unofficially began the process of homeschooling. Although my son was just 5 in October, we know that instead of going to traditional Kindergarten next year, we’ll be keeping him home to home-school. There are Many reasons why we’ve chosen this route. (I would actually love to hear from others of you out there who have also decided homeschooling is best for your family – leave your comments below.) I thought it would be a fun project for me to document little steps of our homeschooling journey along the way, and maybe I can offer some helpful tips for those of you stuck in a rut with lessons. I’ve always been super creative. My husband is continually amazed at how I can just jump into pretty much any topic and turn it into a learning experience in our Sunday School class (we teach 4 year old together) and with the kids at home. Technically they’ve been home-schooled since they were born since we do a lot of learning through everyday activities, but now that RJ is getting a little older, I’m trying to add a little more structure to our home-school environment. (btw that is really hard for me because I am NOT a planner by nature!).

We’ve collected a lot of winter theme books over the last few weeks and I’ve just been taking a book every week and we’ve been doing wintery project related to the story. Here is the book we’ve chosen for this week. “The Biggest Best Snowman Ever”. If you haven’t read the book, its about a little girl who just isn’t big enough to help her sister and mom with all of the things they have going on in the house, etc. So, she goes out to play and with the help of her animal friends she builds a HUGE snowman. After seeing her snowman, her family learns that maybe she is big enough to help after all.

Here’s my daughter showing off the book for you. And yes; her hair always looks like that! lol

IMG_6766 copy

After we read the book, we went around the house and collected all of the “snowballs’ we could find. After having a fabulous snowball fight with the beach balls, etc.. for about an hour chasing each other around the house 😉 we built our snowman. My kids put them in order from largest to smallest and we laid them all out flat on the ground.

IMG_6764

My son (with my help) then traced each snowball shape onto a sheet of large paper (the roll out kind that comes with your easels. You can find these at Ikea or any craft shop.

IMG_6770 copy

We then went throught the entire snowman (starting at the very top) and wrote numbers (on one side Chinese, on the other side English). He’s still learning to recognize a few of his numbers and has been struggling to write all of them so that was my main goal in having him do this part. Then on the inside of the snowman we placed the corresponding number of snowflake stickers

IMG_6773 copy

Here an up close of part of the snowman.

IMG_6775 copy


I then hung this guy up (he reaches all the way to the ceiling) and we’ve enjoyed him for several days now!

High Point Children’s photographer – Storybook Sessions

I am so extremely anxious for nice weather this year because I have so many wonderful ideas and visions for our storybook sessions. These are highly specialized and customized sessions turning your child into their favorite storybook characters. We will offer props, outfits, and custom fantasy editing for these sessions, all outside of our “normal” portraits. These are so exciting, because the sky is the limit. We have so many wonderful visions for these and just cannot wait for you, our wonderful clients to start bringing your kids for this something different, something fun, something you’ll cherish for years and something we all get to have SO much fun creating!!!


_MG_3834 copy